Managing Student Assignments in Assign2
Published on: 2022-10-18 by Edufide
This article provides an overview of how instructors can manage their Assign2 assignments, ensuring that students have access to the assignment, adjusting due dates, releasing grades and feedback to students. Before diving into these details, it is recommended to check out the article Creating Online Homework Assignments Using Assign2 for a comprehensive guide on setting up assignments using the tool. Note that this article focuses on the “Homework” type of assessment, not the “in-person PDF” type.
Contents:
Giving Students Access to Assignments
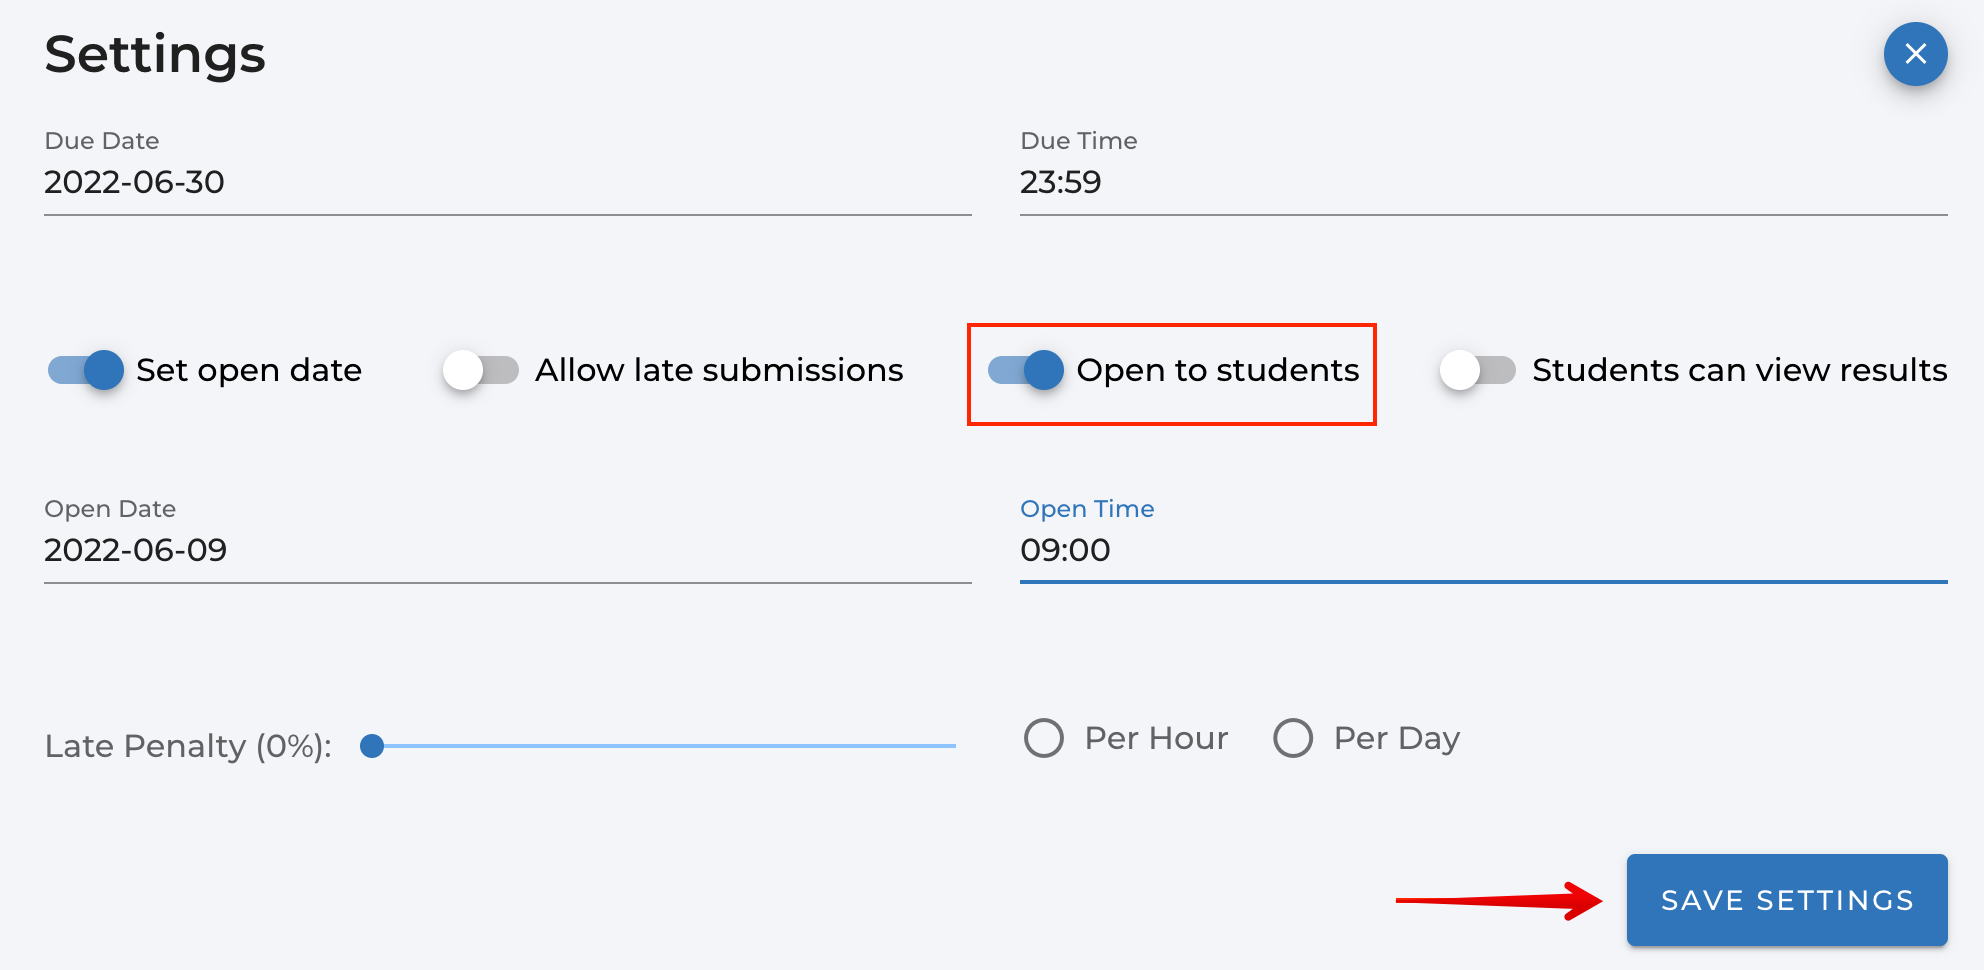
Once your assignment has been saved, it’s important to ensure your students can access the assignment. Assignments can be made available to students manually by toggling ‘Open to students’:
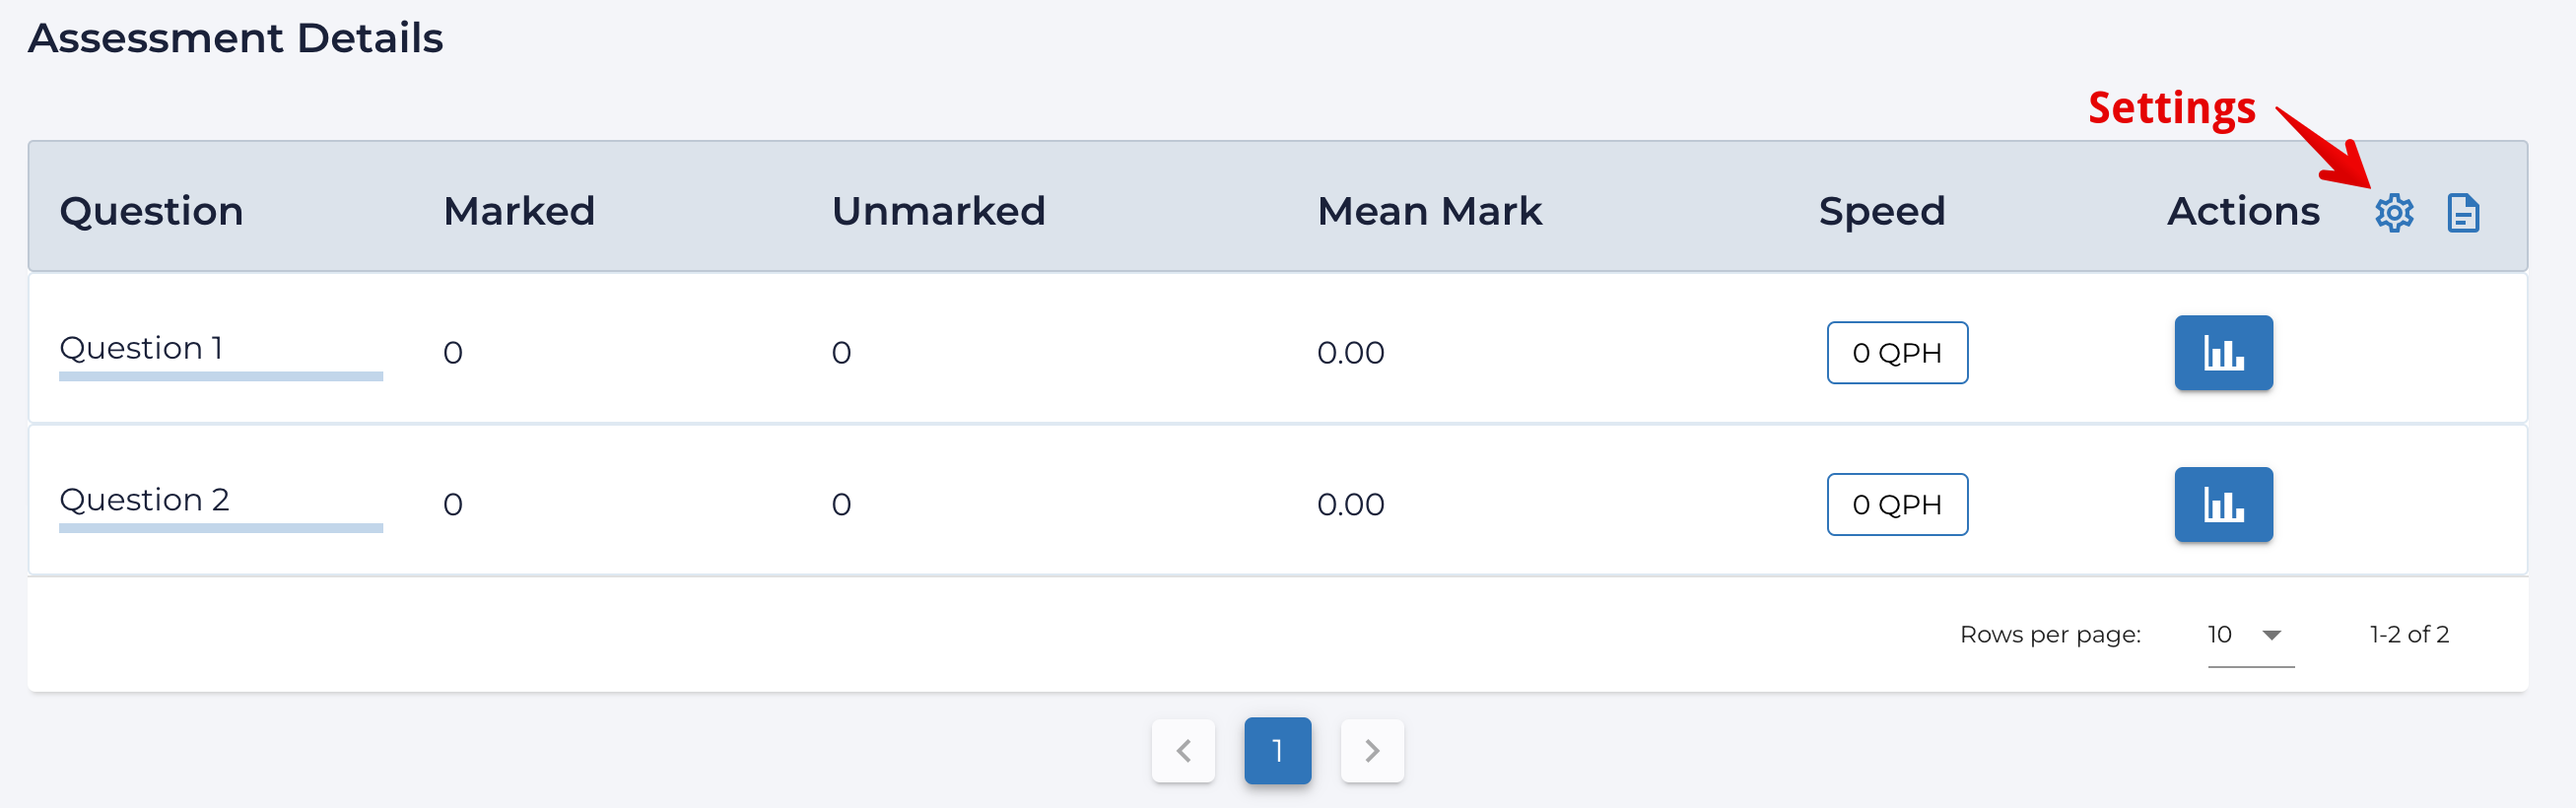
- From the dashboard, click on the Settings icon to the right of the page:
.png)
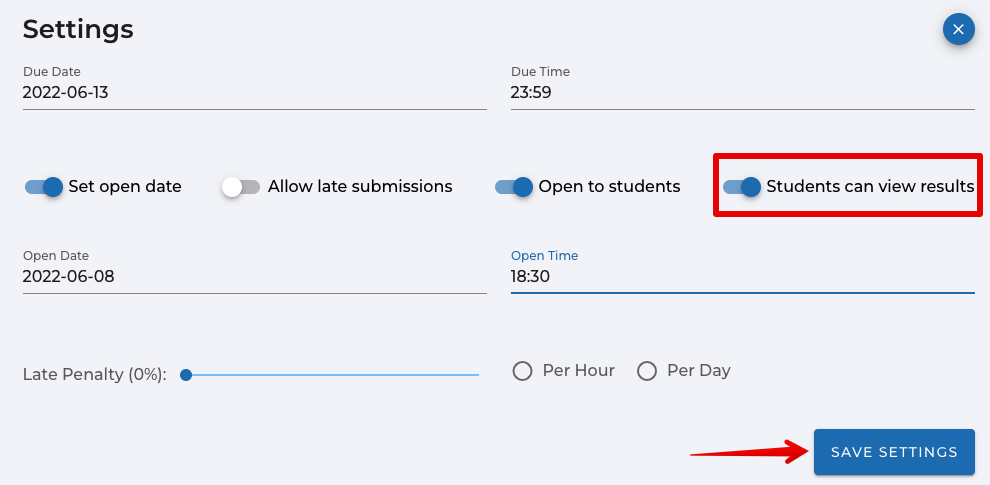
- Toggle the Open to students option on and click Save Settings:
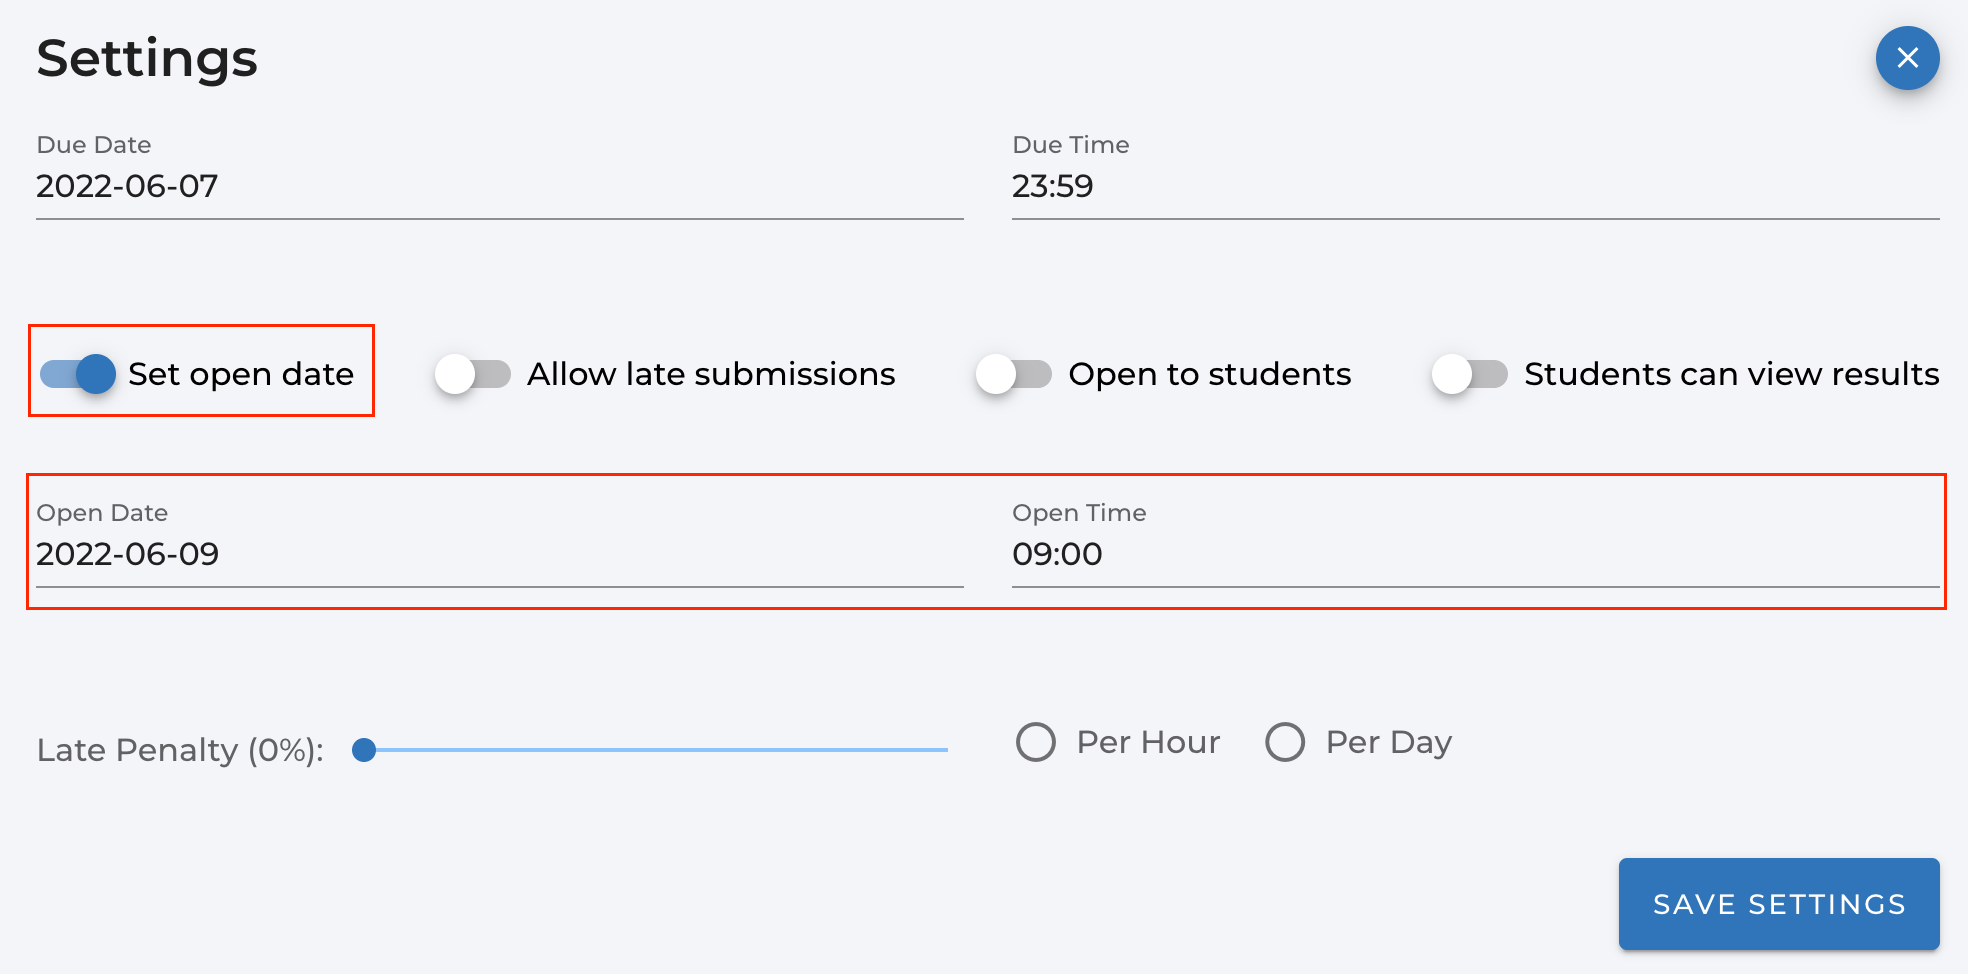
Assignments can also be set to open at a specific time through ‘Set open date’ (available by updating the settings after the assignment has been created) and then entering the date and time when the assessment should automatically toggle open for student access:
Note: Date and time settings are set to the user’s local time. If you are in a different time zone, please adjust the date and time accordingly.
Managing Student Submissions
Students are automatically populated in Assign2 when an assessment is created. Please note: a known issue prevents students lists from populating when access restrictions are set on the external tool link. Instructors can hide assessments and release them manually as a workaround.
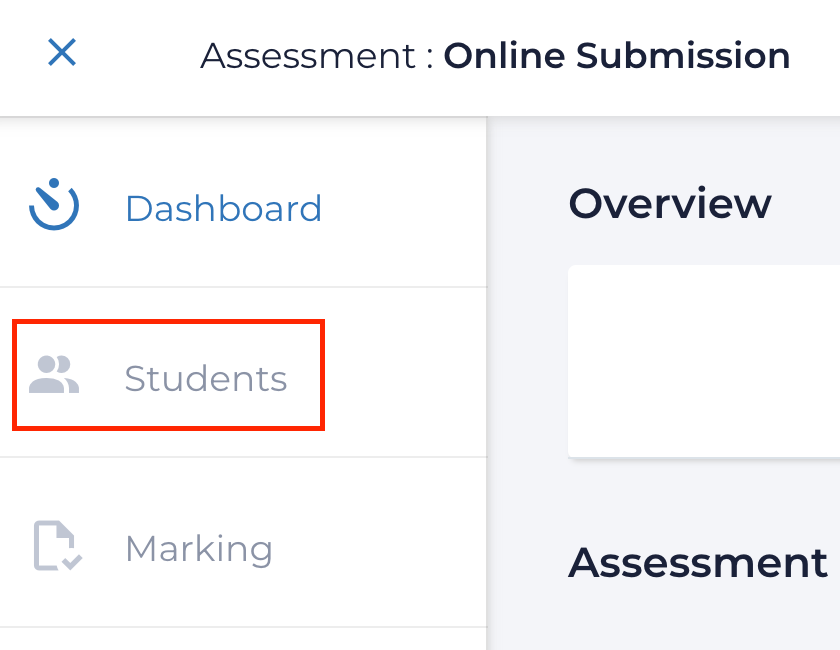
Your class list will be displayed in the “Students” tab in your dashboard:
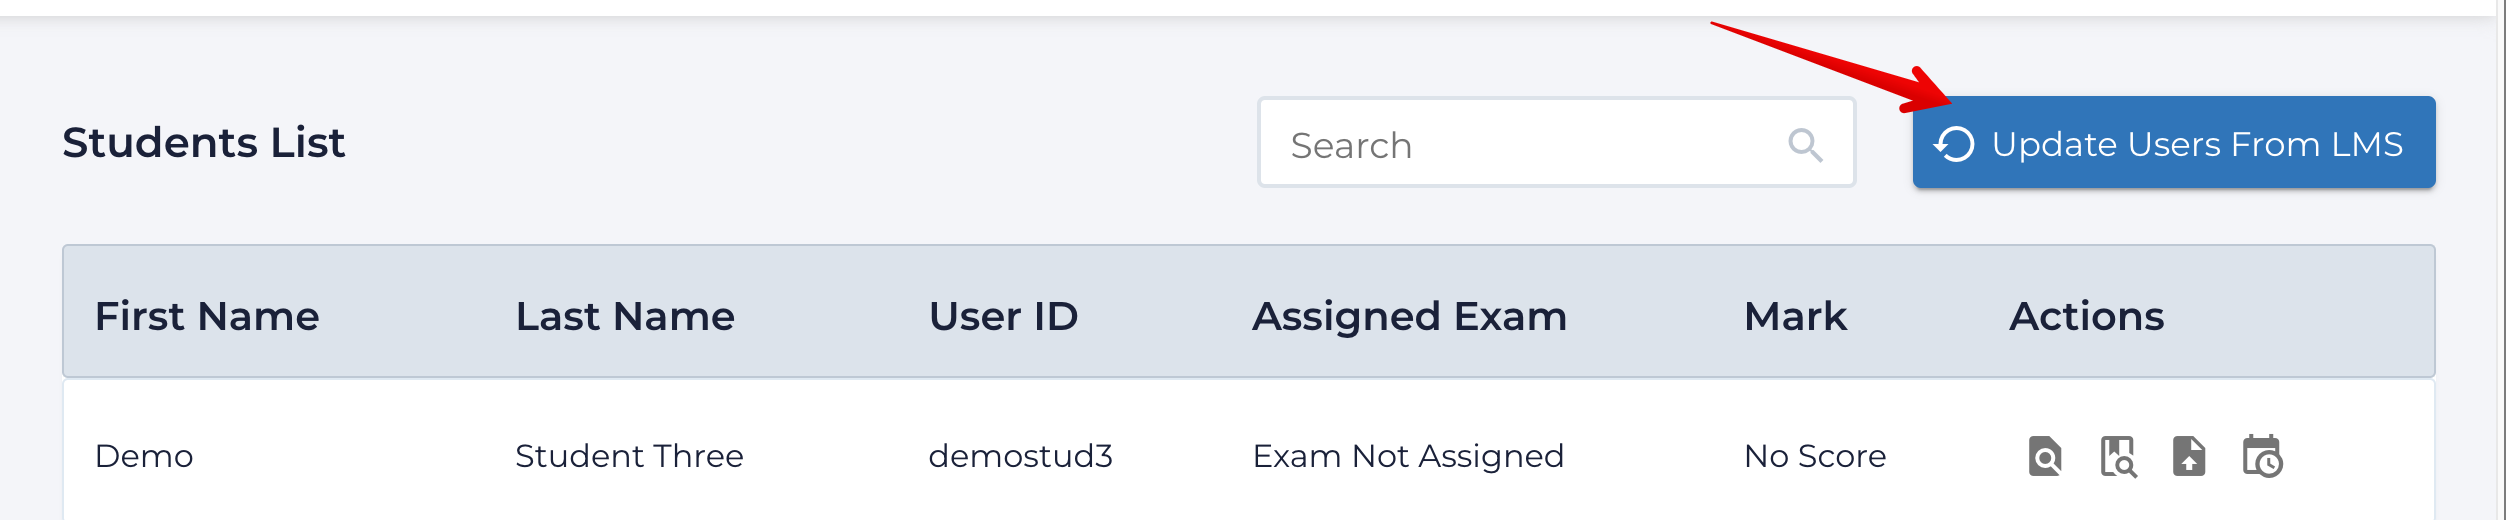
If your class list changes (due to students adding or dropping) after an assessment is created, you can click the Update Users from LMS button in the top right corner to match up your roster.
The students table has several features:
- Student submissions appear in the ‘Assigned Exam’ column - the row will display ‘Exam Not Assigned’ if they have not submitted their assessment.
- Instructors can locate specific students by searching or sorting to find their submission
- A preview of a student’s submission can be viewed by clicking the magnifying glass icon beside their assigned exam.
- The available functions are located in the Actions column.
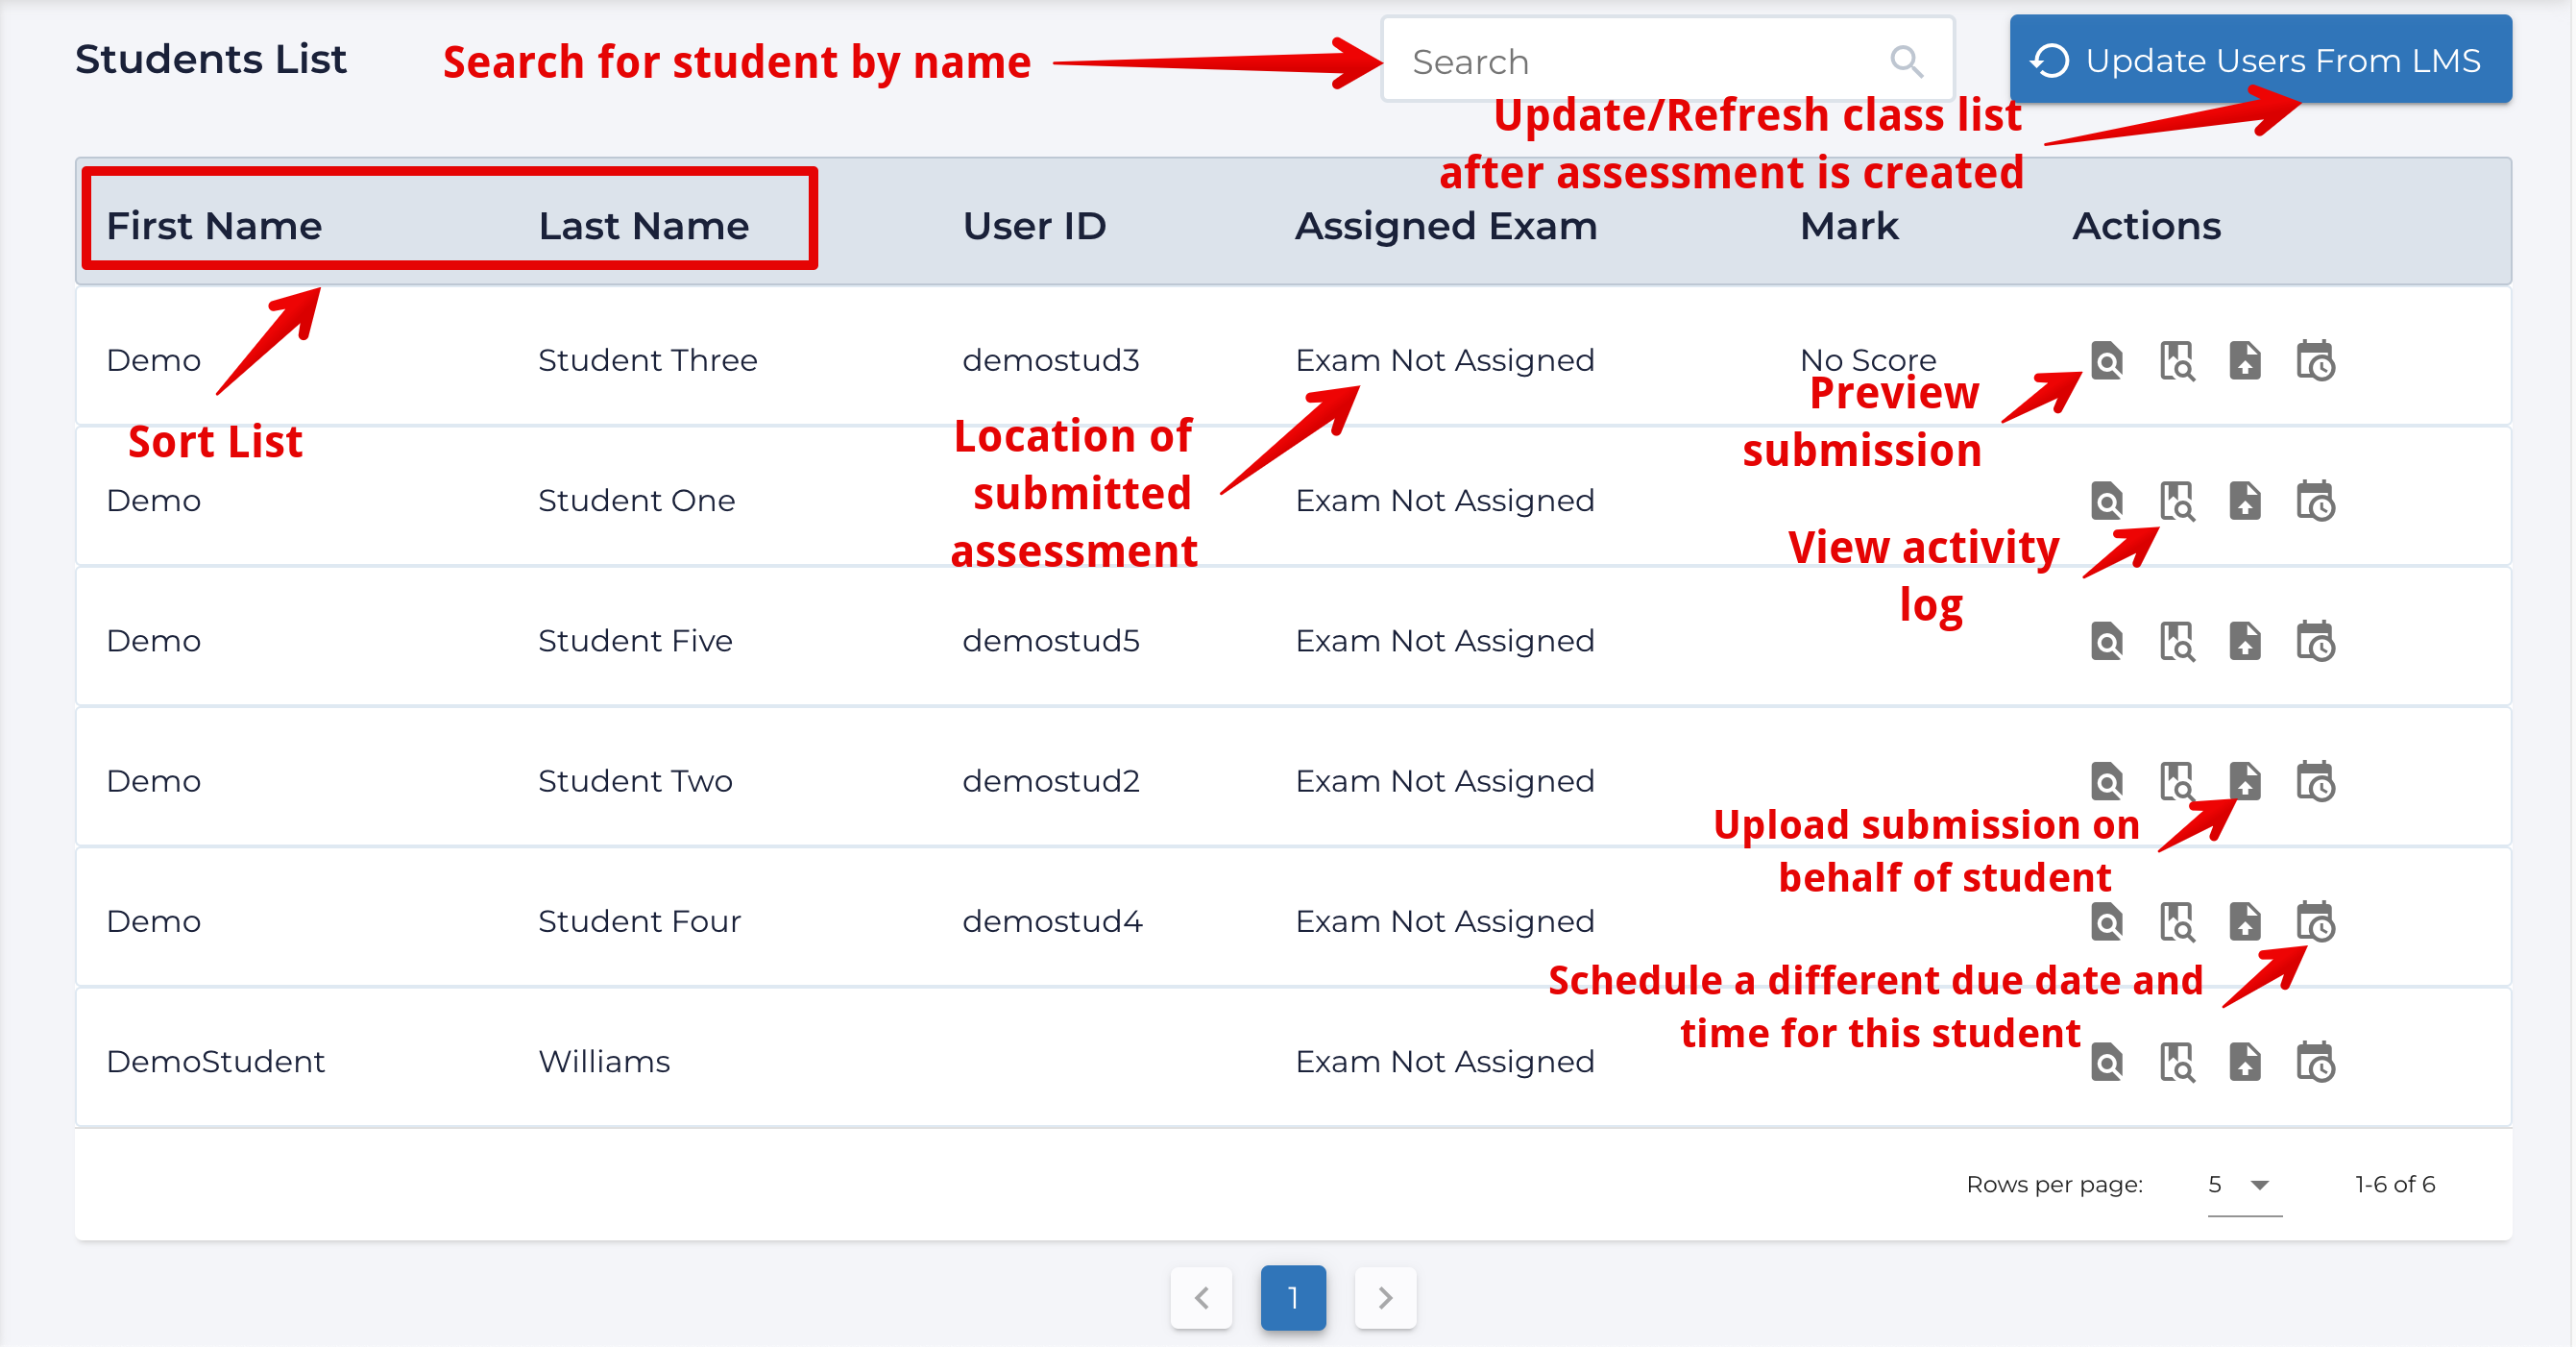
- The actions include:
- Viewing a student’s uploaded files under Preview submission.
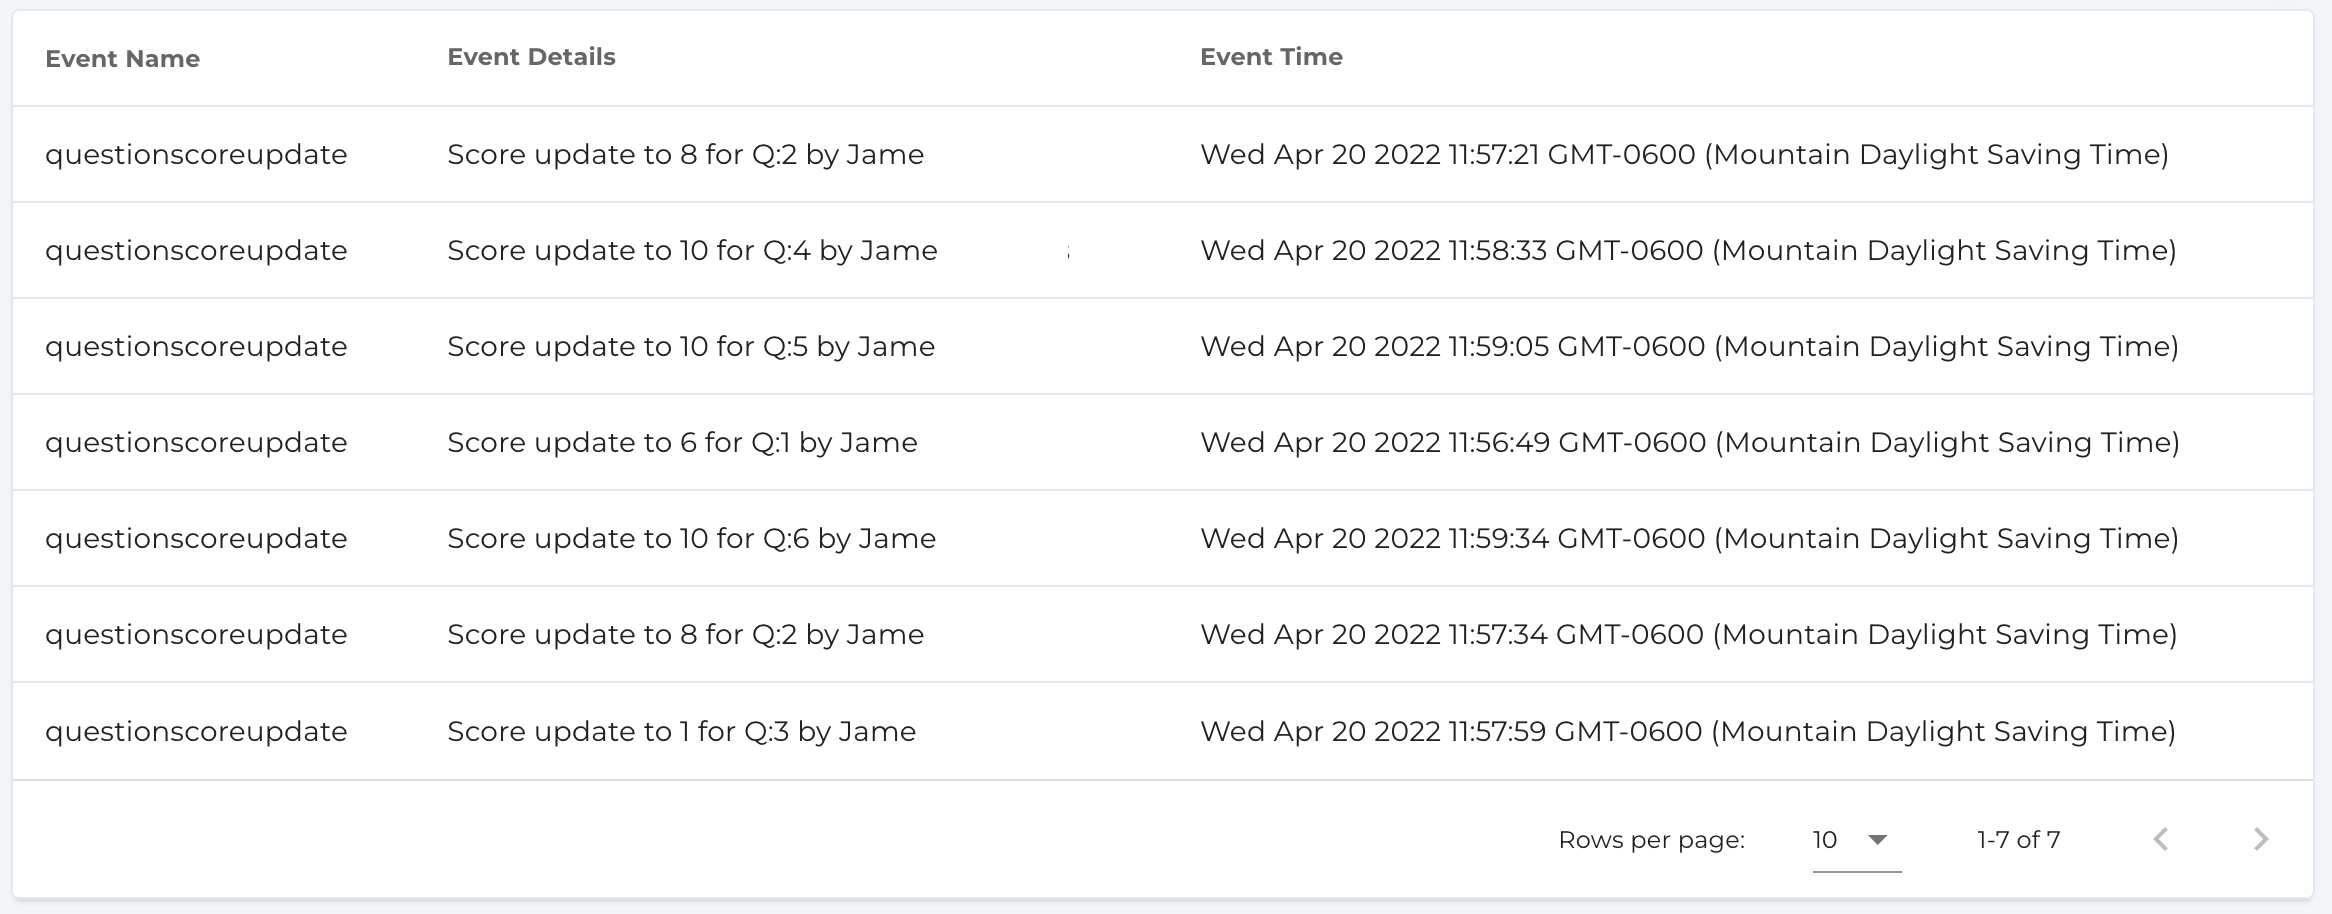
- Review the full history of the submission and grading actions for all markers working on an assessment by selecting View Activity Logs:
- Upload a student’s submission in lieu (in case they haven’t been able to upload it themselves) so that it can be graded online.
- Set a different due date and time for a student.
- Note: Overridden dates and times must be added AFTER the questions are created in an assessment. These can be added initially as placeholders but the number of questions CANNOT be edited after any individual student overrides have been added. Adding an override will also adjust the submission count for these students on the dashboard page (even though they will not have accessed the assessment).
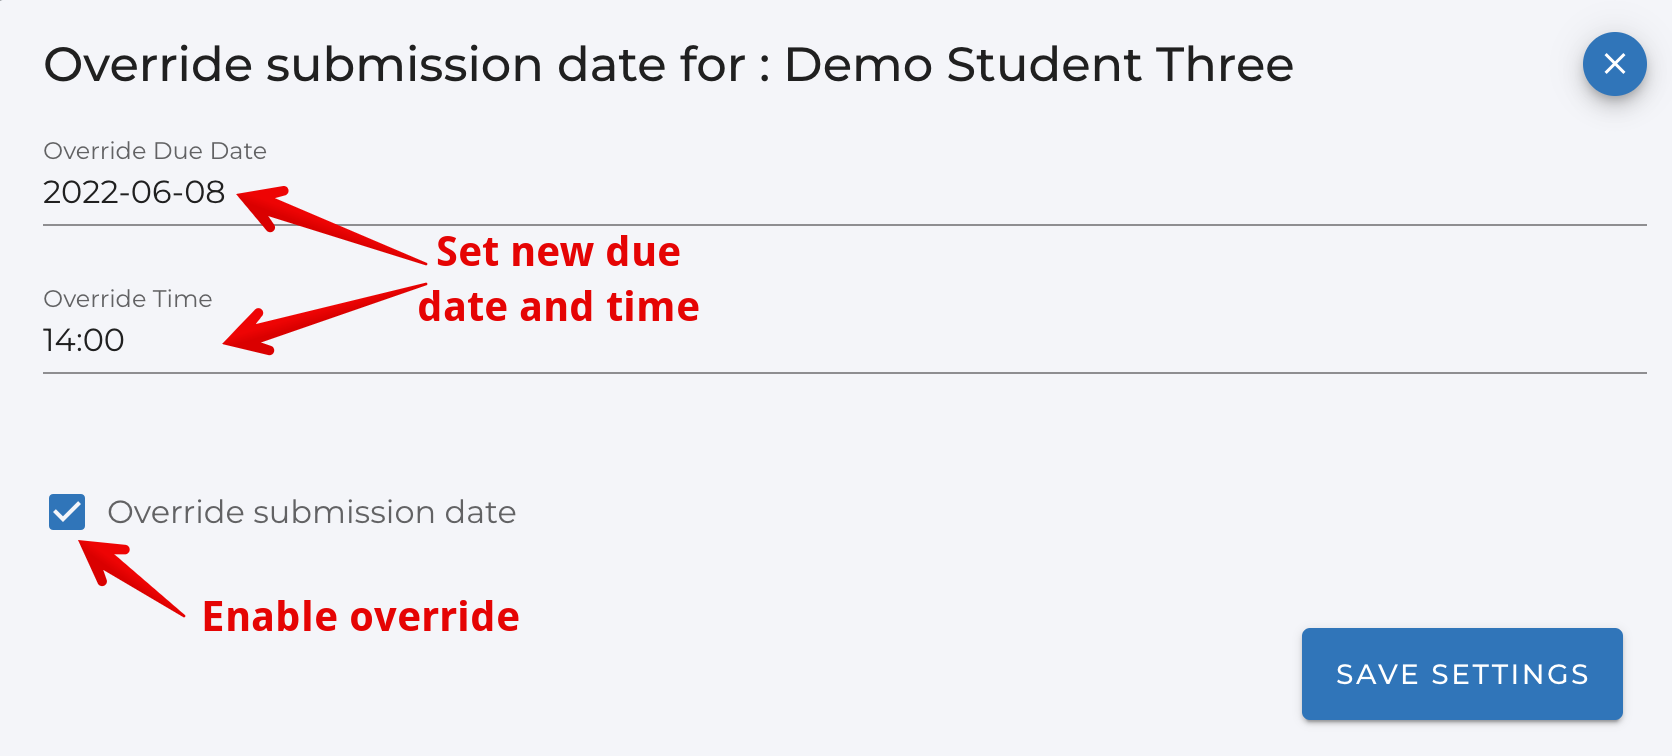
Overridden students appear in blue:

Managing Deadlines
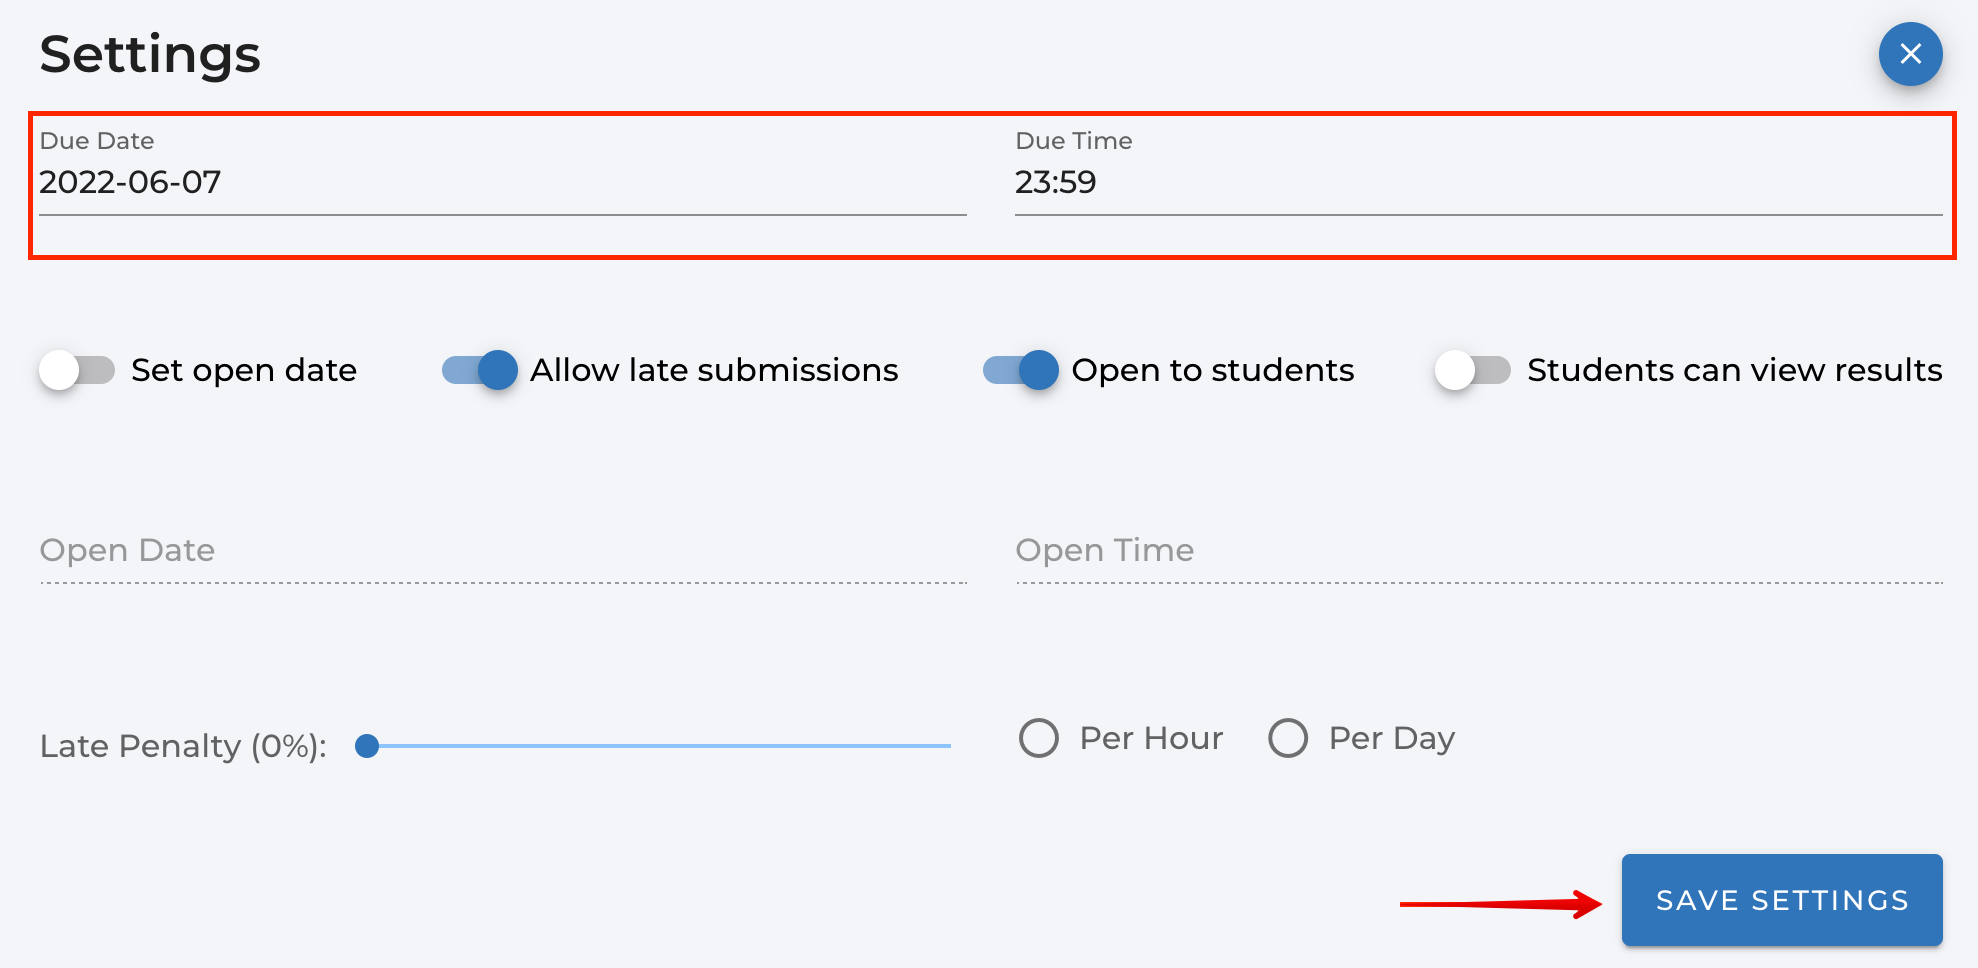
If you need to change the date or time the assignment is due or change whether or not late submissions are allowed, follow these steps:
- Go to the Dashboard page in Assign2 and click on the Settings icon to the right of the page.
.png)
- Update the Due Date & Time as needed and click “Save Settings”.
- You can also change whether late submissions are allowed, make the assignment open to students, or make the marked assignment visible to students on this page.
- Date and time settings are set to the instructor’s local time.
Releasing Grades To Students
Once all of the assignments are marked instructors can release the grades to students by pushing the scores to the LMS gradebook; students can also be shown their in-context marks and any added feedback for each question directly in Assign2 (see below).
Before releasing grades, ensure that on the Dashboard page, the “Fully Marked” column matches the “Total Exams” column.

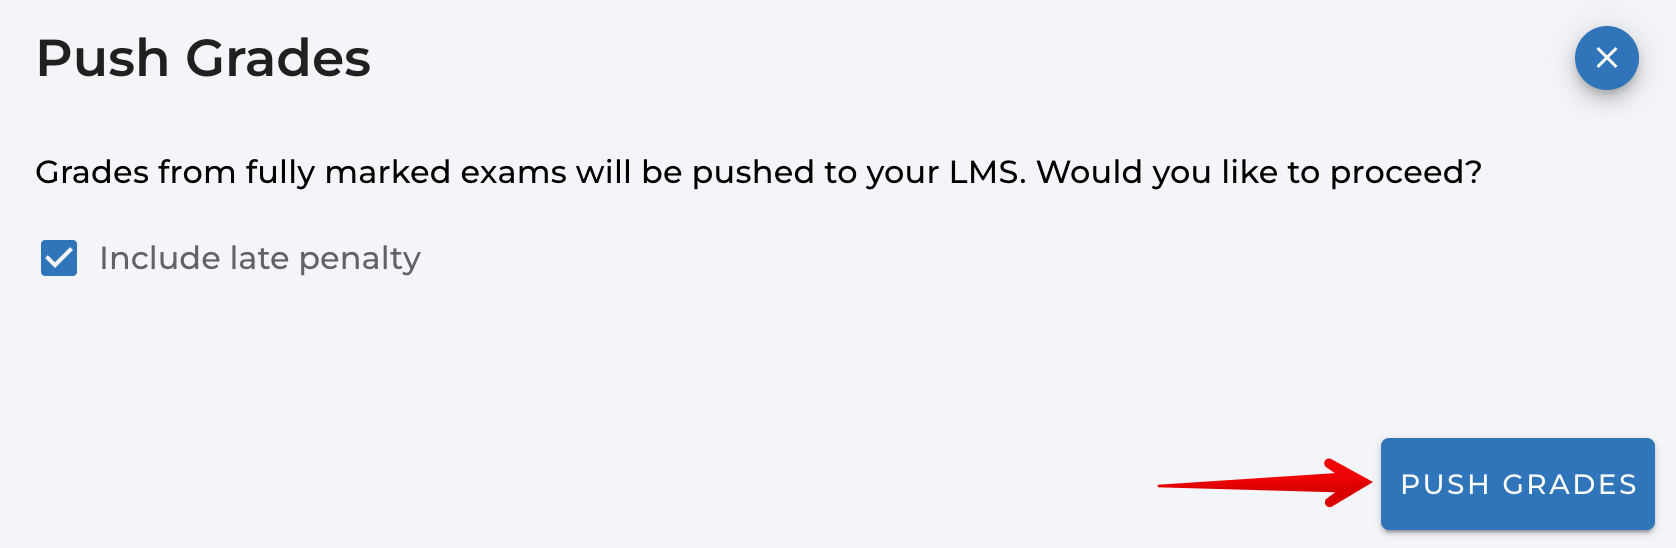
Once all exams are marked scores must be transferred to the LMS by clicking Push Grades. This will upload each student’s mark for the assignment into the gradebook in LMS. Students will see their total mark received on the assignment in Gradebook unless you have grades set as hidden.
On your Dashboard, click the icon to the right of ‘Fully Marked’ to Push Grades:

An overlay will confirm if you would like to proceed and give the option to include or exclude late penalties. Click “Push Grades” to confirm the action:
Making Grades AND Feedback Visible within Assign2
Instructors can allow students to view the mark they received on each individual question as well as any feedback or annotations you provided in Assign2 (in addition to seeing their total score in the course gradebook). Important note: displaying this contextual feedback to students will prevent any further submissions from being made for that particular assessment so this action should ONLY be taken after all students have completed their work.
To do this:
- Go to your Dashboard and click on the Settings icon.
- Toggle the “Students can view results” option on and then select “Save Settings”.
Note: Students do not automatically receive a notification that this has been done so you will need to let them know that their results are now available for review in Assign2. When they click on the assignment in LMS again it will take them directly to their results.