Creating Coding Assignments Using Assign2
Published on: 2023-05-16 by Edufide
This article describes how instructors can create online programming assessments using the Assign2 external tool. This assignment type allows students to submit code that can be automatically graded in a predefined environment, with an option for additional manual grading.
Contents:
Creating a Coding Assignment
For each new Coding Assignment, an Assign2 tool activity must be added to your course through your Learning Management System (LMS). This option is typically found under “External Tools.”
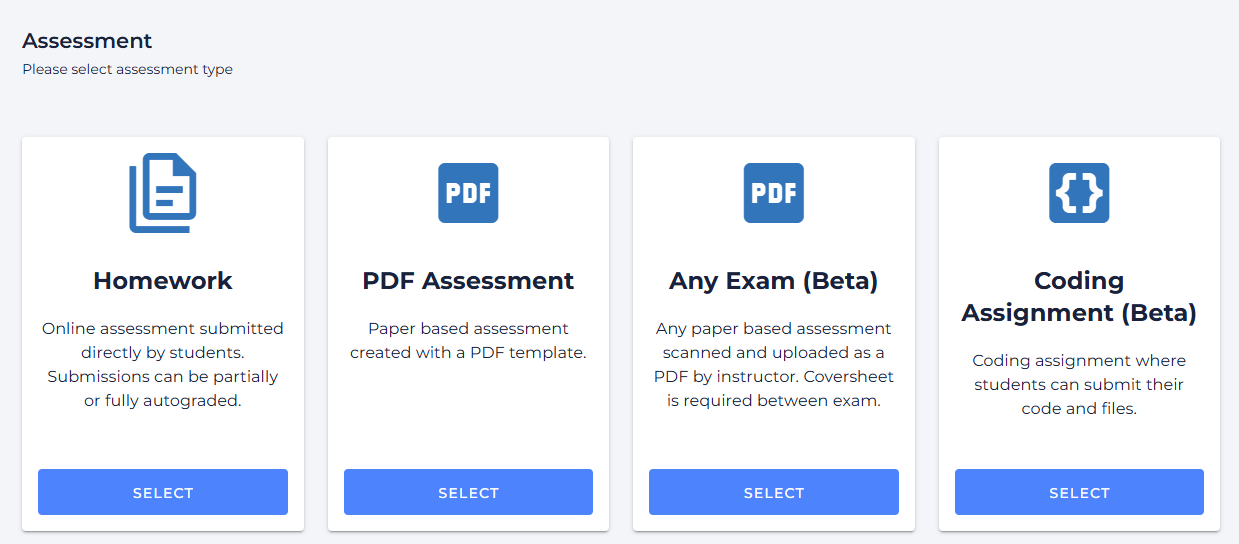
Once the tool link is added to your course, click on it to begin the setup process. You will be prompted to select the type of assignment you wish to create.
Configuring the Assignment
From the tool’s main page, select the Programming Assessment option to access the configuration settings.
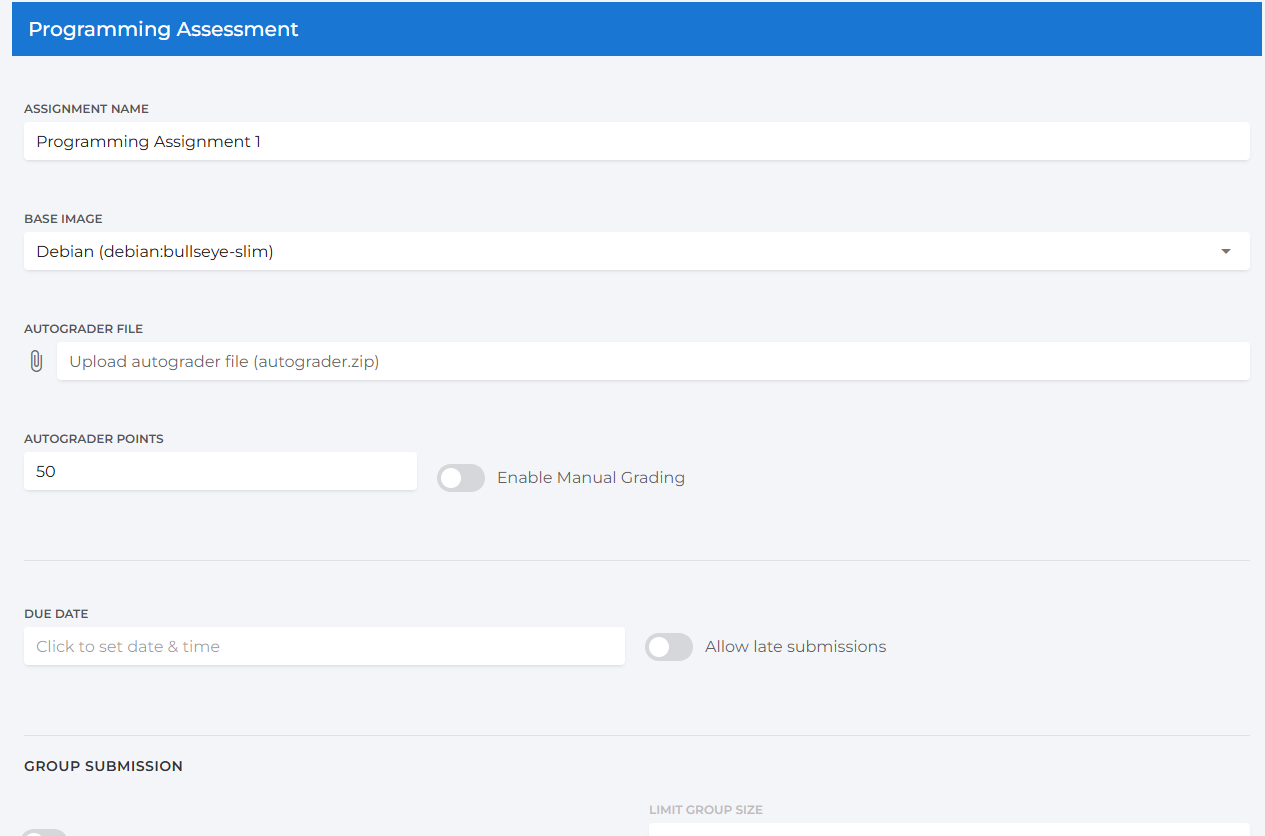
Once the assessment type is selected, you can configure the assignment details:
ASSIGNMENT NAME: Enter a descriptive name for the assignment.
BASE IMAGE: Select the base software environment for the autograder. This determines the operating system and pre-installed software that your autograding script will run on.
AUTOGRADER FILE: Upload the autograder itself as a
.zipfile. The system will automatically check the file upon upload to ensure it is valid. A success or error message will be displayed.AUTOGRADER POINTS: Set the total number of points that can be awarded by the autograder.
Enable Manual Grading: Toggle this switch if you wish to grade some portion of the assignment by hand. When enabled, a field for MANUAL POINTS will appear where you can set the number of points allocated for manual grading.
DUE DATE: Click this field to open a calendar and set the submission deadline for the assignment.
Allow late submissions: Toggle this switch to permit students to submit their work after the due date has passed.
Enable Group Submission: Activate this option to allow students to submit their work in groups. When enabled, you can specify a LIMIT GROUP SIZE to set the maximum number of students per group.
Once you have finished configuring the settings, click Create Assignment to finalize the setup. Click Cancel to discard your changes.
Preparing the Autograder Zip File
The autograder zip file contains all the necessary components for testing student submissions. The structure is language-agnostic, meaning you can create assignments for Python, Java, C++, JavaScript, or any other language supported by the selected base image. The autograder is built on a Linux environment.
File Structure Overview
The root of your zip file must contain your autograder scripts and configuration files. A typical structure looks like this:
.
├── config.json
├── requirements.txt
├── run_autograder
├── run_tests.py
├── setup.sh
└── tests/
  ├── test_files.py
  └── ... (other test files)
Key Files and Their Roles
setup.sh
This is a shell script that prepares the grading environment. It is the first file executed when the autograder image is built. Its primary role is to install any necessary compilers, interpreters, libraries, or dependencies.
#!/usr/bin/env bash
# Example for Python:
apt-get update
apt-get install -y python3 python3-pip python3-dev
pip3 install -r /tmp/autograder/source/requirements.txt
run_autograder
This is the main executable script that the system runs to grade a student’s submission. The student’s submitted files are located in the /tmp/autograder/submission directory. Your script should copy these files to the execution directory (/tmp/autograder/source) and then trigger your test runner.
#!/usr/bin/env bash
# Copy student's submission into the source directory
cp /tmp/autograder/submission/sort.py /tmp/autograder/source/sort.py
# Navigate to the source directory and execute the test runner
cd /tmp/autograder/source
python3 run_tests.py
The results.json Output Format
The core of the autograding process is the results.json file. Your test runner, regardless of the language used, must generate a file with this exact name in the /tmp/autograder/results/ directory. This file communicates the test outcomes, scores, and feedback to the Assign2 system.
The file must adhere to the following JSON structure:
{
"stdout_visibility": "visible",
"output": "All files submitted and tests run.",
"tests": [
  {
    "score": 10,
    "max_score": 10,
    "name": "Test Case 1: Basic Functionality",
    "output": "Test passed successfully.",
    "visibility": "visible"
  },
  {
    "score": 5,
    "max_score": 10,
    "name": "Test Case 2: Edge Cases",
    "output": "Test failed: Incorrect handling of empty input.",
    "visibility": "after_due_date"
  }
]
}
Here is a breakdown of the key fields:
stdout_visibility(Optional): Controls when the overalloutputmessage is visible to the student. Can behidden,after_due_date, orvisible.output(Optional): A general, top-level message that will be displayed to the student about the autograder run.tests: An array of objects, where each object represents a single test case.score: The number of points the student earned for this test.max_score: The maximum possible points for this test.name: A descriptive name for the test case that will be shown to the student.output: A message providing specific feedback for this test case (e.g., “Test passed,” or an error message).visibility: Controls when the student can see the results for this specific test. Common options arevisible(immediately),after_due_date, andhidden.
Navigating After Creation
After the assignment is created, you can manage it using the three main tabs in the Assign2 interface: Students, Marking, and Dashboard. You can switch between these tabs using the navigation drawer in the top left.
Dashboard Tab
The assignment Dashboard provides a central hub for monitoring the status of the autograder environment, tracking grading progress, and managing assignment settings.
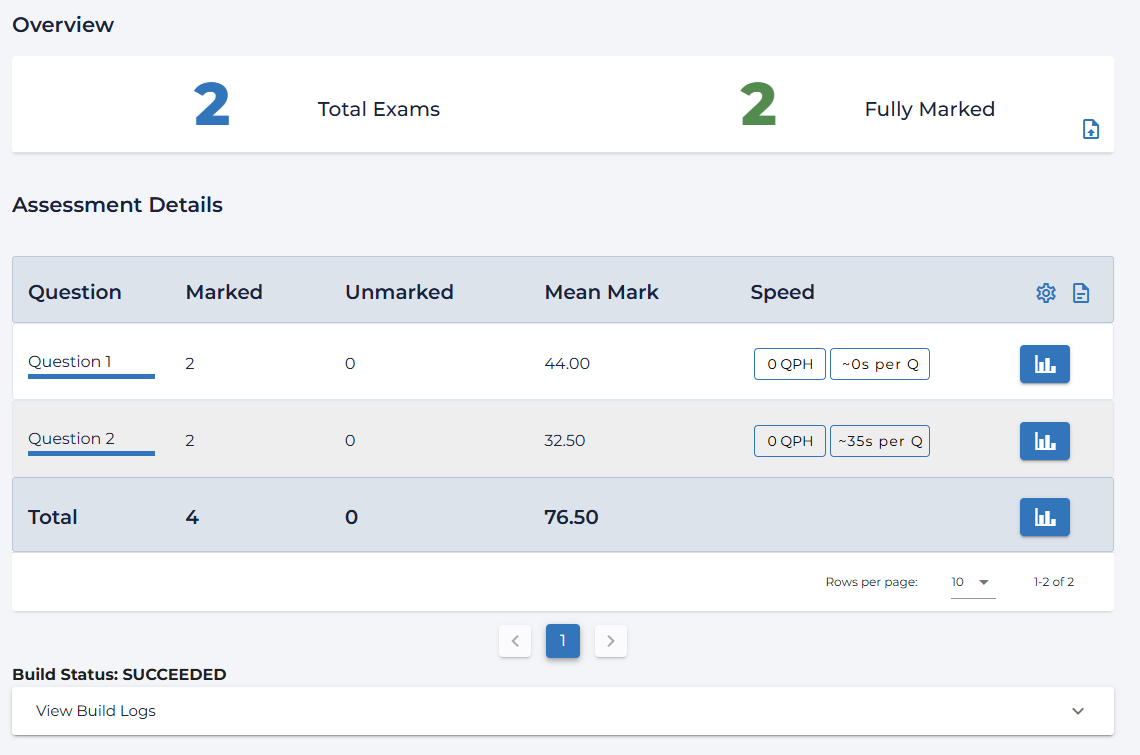
Overview
The top of the dashboard displays an overview of submission statistics, including the total number of submissions and the number that are fully marked. Once grading is complete, you can use the Push Grades button (📤) to send the final scores to your LMS gradebook.
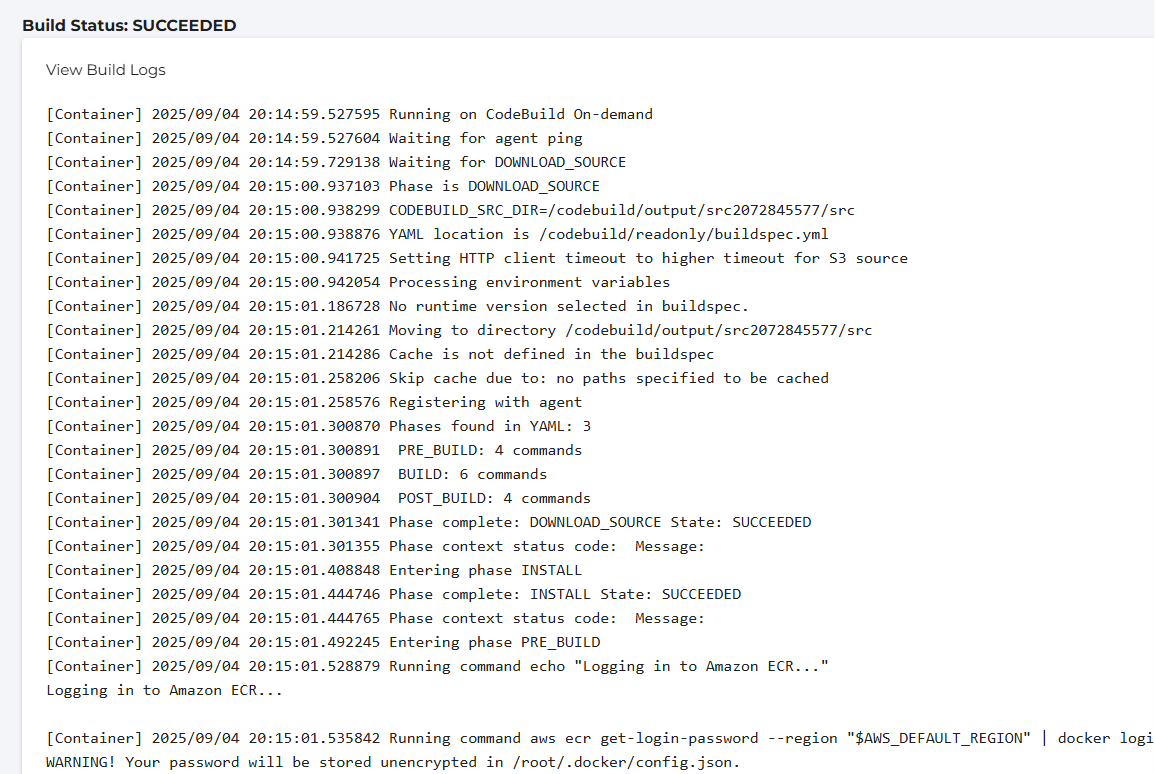
Build Status
A critical feature of the Coding Assignment dashboard is the Build Status panel. This section shows the real-time status of the Docker image build for your autograder environment (e.g., SUCCEEDED, IN_PROGRESS, FAILED). If the build fails, you can expand the panel to View Build Logs. These logs provide detailed output from the build process and are essential for debugging your setup.sh script or other configuration files in your autograder.
Assessment Details and Actions
The main table on the dashboard shows a per-question breakdown of marking progress, including mean scores and grading speed. From the dashboard, you have several key actions:
Edit Exam (📄): Return to the main assignment configuration page to modify questions or scoring.
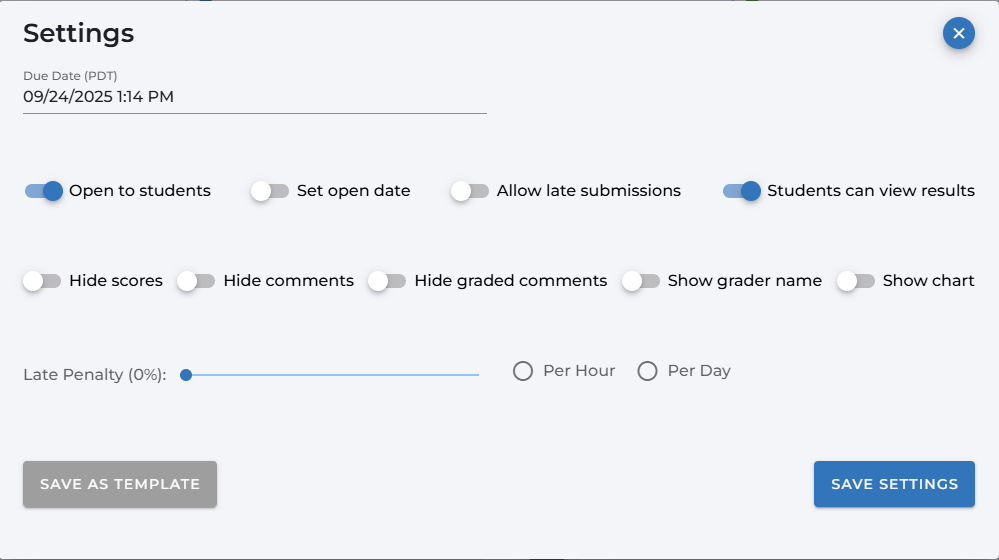
Assessment Settings (⚙️): Opens a modal window where you can adjust post-creation settings. This includes changing the due date, enabling/disabling late submissions, setting late penalties, and controlling when students can view their results and feedback.
View Statistics (📊): View a histogram of score distributions for individual questions or for the entire assignment.